Getting Started #
Are you unable to use the split month feature on a pay period but still want to accrue job cost for the 1st month? This template allows you to accrue the job cost (wages, addons, burden) for a specified pay period.
Template Info #
- Required Source Data
- You must have timecards entered for the specified pay period.
- Additional Tips
- Timecards dated in the same month as the BatchMth are included.
- The CostType column defaults as 1.
- The timecard detail columns on the right side are driven by the Include in JC Detail settings on PR Company Parameters in Vista. This follows standard Vista JC Detail logic.
- This can handle intercompany entries if your AP Invoices are coded across companies.
- This can handle multiple companies in the same download. Each action below will be unique to the Company on the record.
- Basic Steps
- Download the Data
- Get Batch #
- Import the Records
Start Import Process #
Click the Templates button on the left side of the ribbon.

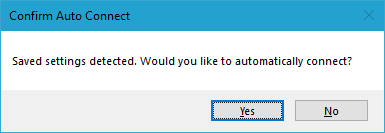
If you’ve signed into TAD before, then you should receive the message below. Click Yes.
If you have not signed into TAD before, follow the Get Connected instructions.
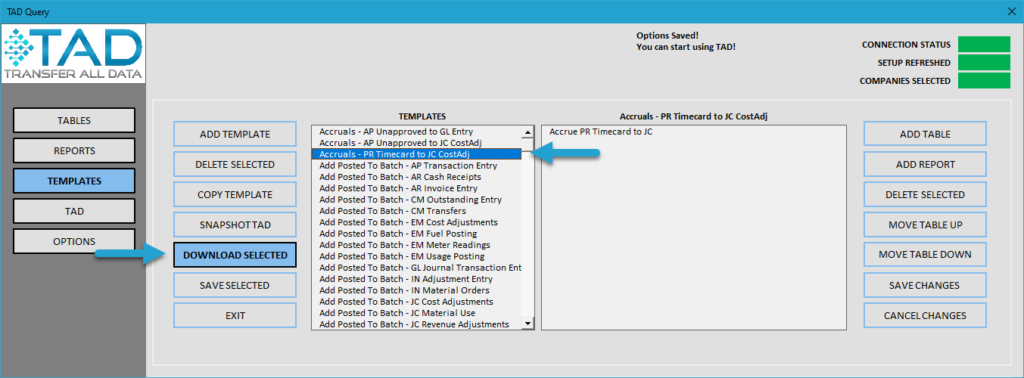
Select the Accruals – PR Timecard to JC CostAdj template.
Click the Download Selected button.
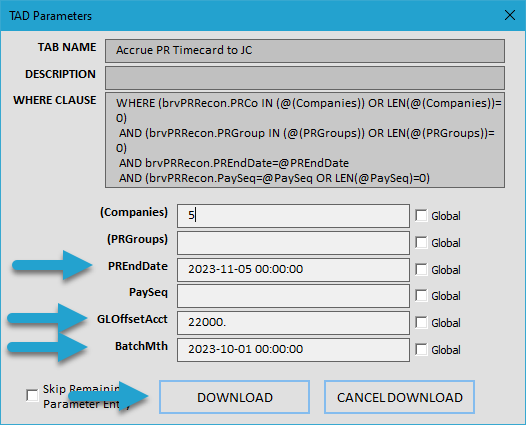
Press F4 in the PREndDate parameter or type in the pay period you want to accrue.
Press F4 in the GLOffsetAcct parameter or type in the GL Account you want to use to offset the expense.
Press F4 in the BatchMth parameter or type in the month you want to accrue the expense.
Click the Download button.
You will now see one record per timecard.
Click the Format Table button.
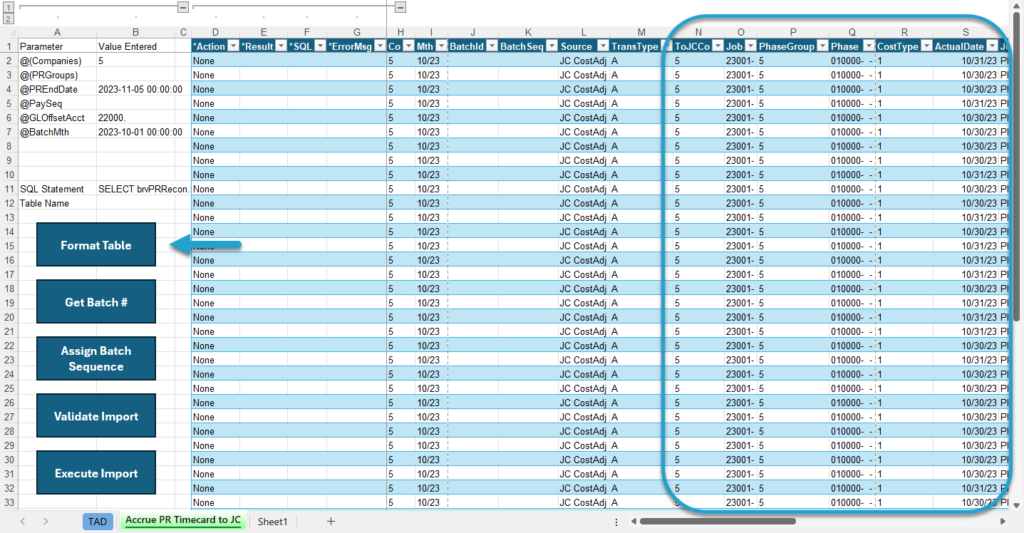
The *Result column will show Formatted for every record.
Click the Get Batch # button to have a new batch number assigned per Co/Mth column combinations.
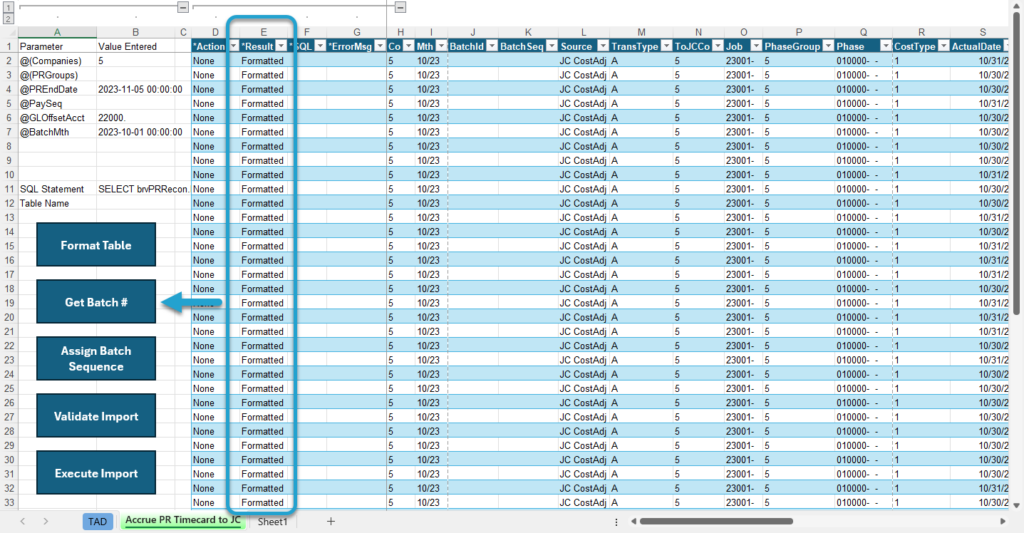
The *Result column will show Batch #XX Assigned for every record.
Click the Assign Batch Sequence button to assign the BatchSeq column a value per Co/Mth column combination.
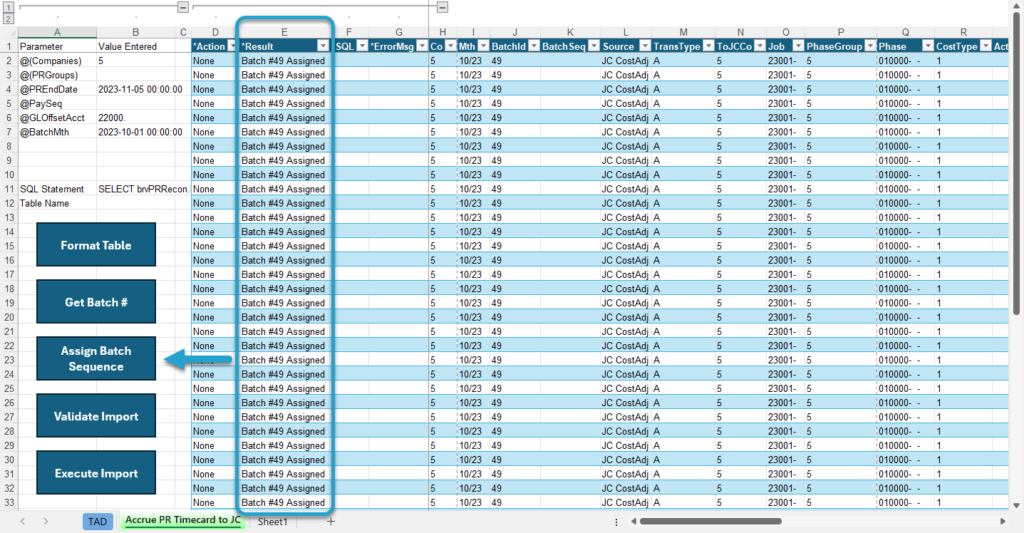
The *Result column will show Batch Sequence Assigned for every record.
Click the Validate Import button to see if there are any errors with the records.
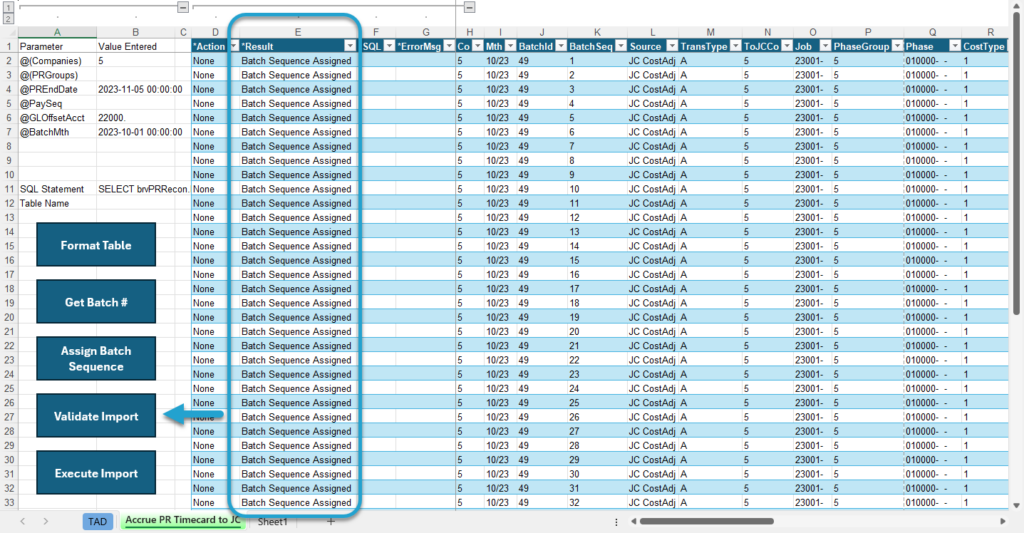
The *Result column will show Validated for every record. If this says Failure, then the *ErrorMsg column will provide the error.
Click the Execute Import button to import the records into Vista.
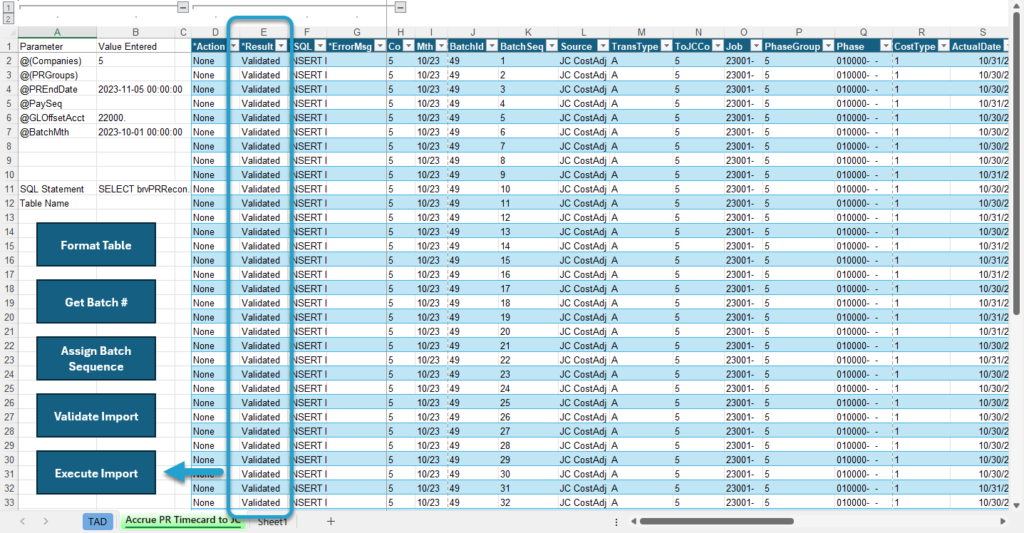
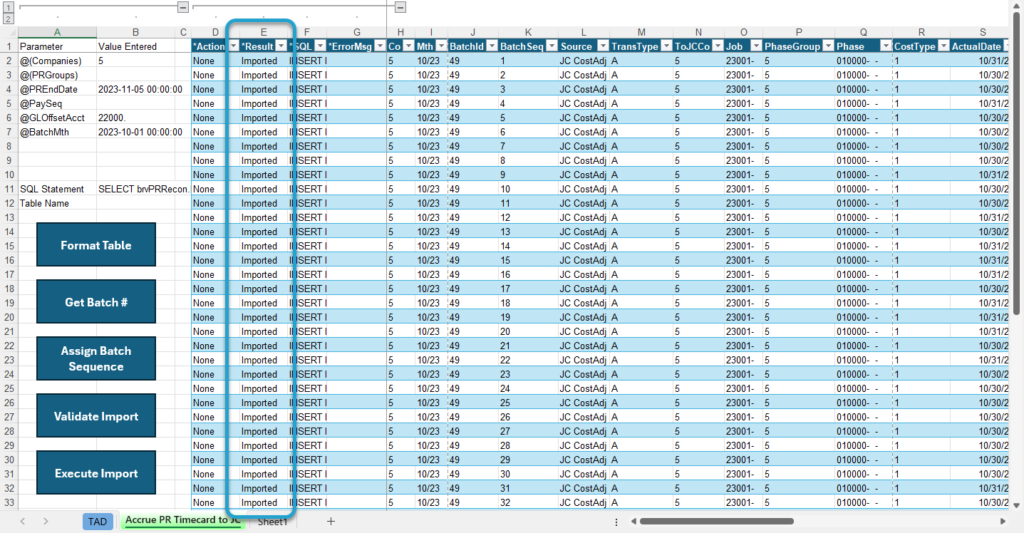
The *Result column will show Imported for every record. The batch is now available in Vista to open and post!
Run Package #
As you get more comfortable with the process, you can utilize the Run Package button on the ribbon. Instead of clicking through each blue action button, the Run Package button runs each action consecutively. The process will stop if any of the actions fail.
