Getting Started #
Batch templates streamline the import process by ensuring consistency and accuracy when transferring data into the system. This guide will walk you through the essential steps to download a batch template, adjust the column layout, and save the file in the correct format to prepare it for import.
Summary Steps #
- Manually Entering a Record in Vista – Enter a sample record into Vista to understand the required fields and format for the import.
- Downloading the Batch Records – Download the batch of records you want to import into Vista to use as the source for the template.
- Rearrange Columns – Organize and rearrange the columns in the batch records to match the required format for the import template.
- Save (Scrape) the Layout – Save the layout of the batch records to capture the correct structure for future imports.
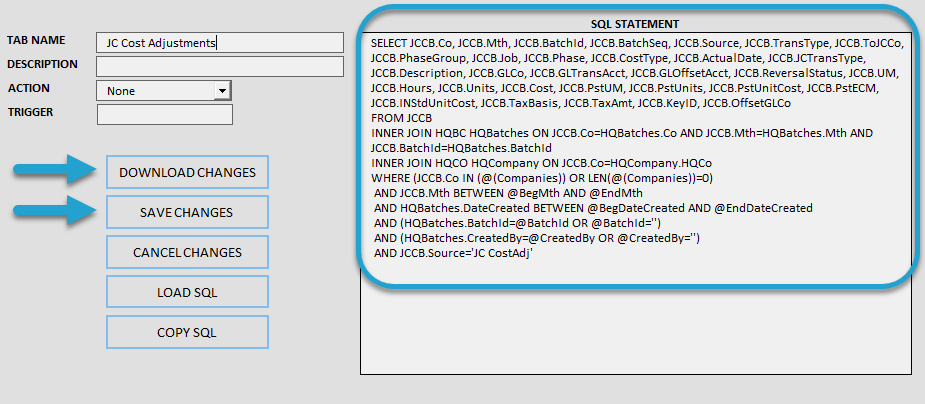
Create Batch Import Template #
Manually Entering a Record in Vista
The easiest way to identify which columns require values is to manually enter a single record in Vista. Once entered, you can download that record and use it as a reference for entering the remaining records. If you’re already familiar with importing into the specific table, you can skip this step.
Downloading the Batch Records
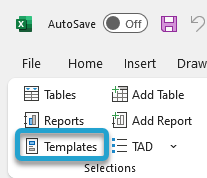
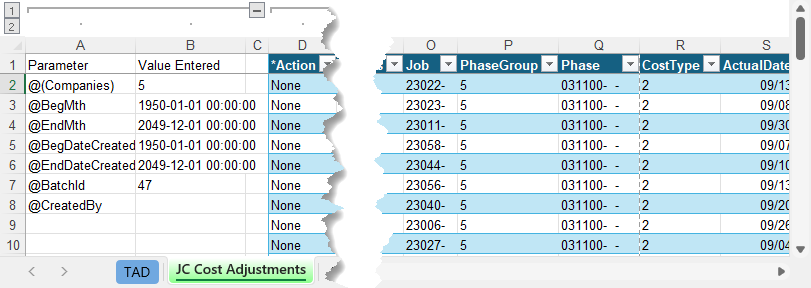
Click the Templates button on the left side of the ribbon.
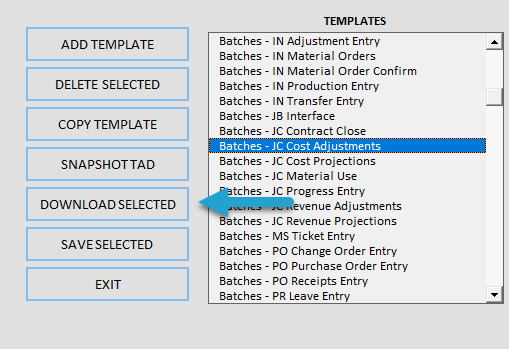
Find the Batches templates containing your records.
Click the Download Selected button.
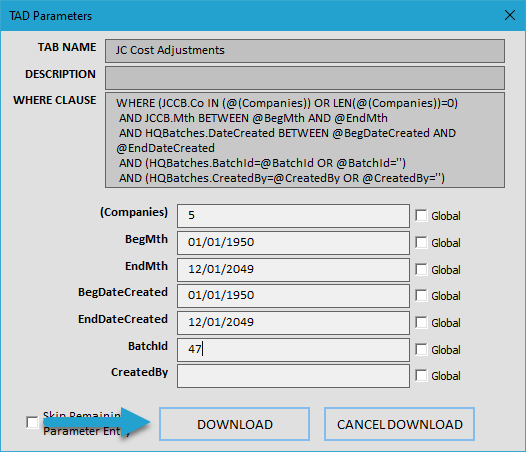
You can press F4 in the BatchId parameter to select your specific batch, or leave it empty to download all open batches.
Click the Download button.
Rearrange Columns
You will see a table appear containing all columns and all records, which is the default layout. The main changes you will make are:
- Delete Empty Columns – Removes all columns that are completely empty.
- Move Empty/Optional Columns – Moves empty and non-required fields to the end of the table, keeping required columns and those with data at the beginning.
- Manually Rearrange the Columns – Adjust the column order to make the layout easier to follow.
These steps will help improve the template’s readability and ensure that only the necessary information remains.
Delete Empty Columns
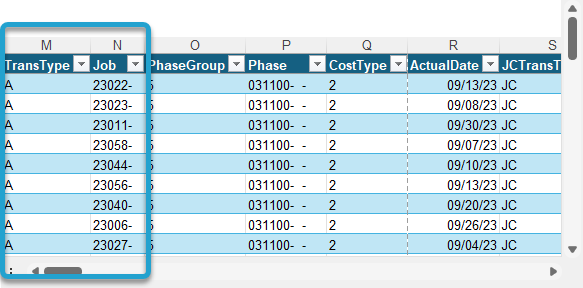
First, click the Format Table sub-menu and select the Delete Empty Columns button. This will delete all columns where every row is empty, meaning your sample record didn’t populate a value, so it is not required for your entry.
The example below shows the CostTrans column, which is empty for all records.
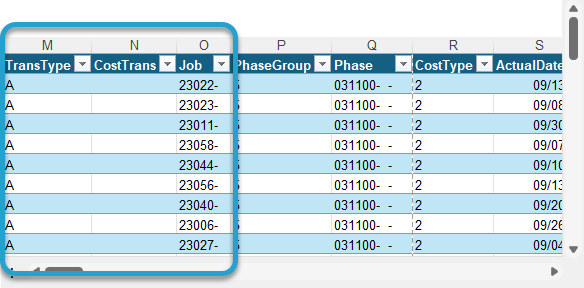
After using the Delete Empty Columns button, the CostTrans column will be deleted, cleaning up the table. This is especially helpful for tables like JC Cost Adjustments, which has many columns.
Manually Rearrange the Columns
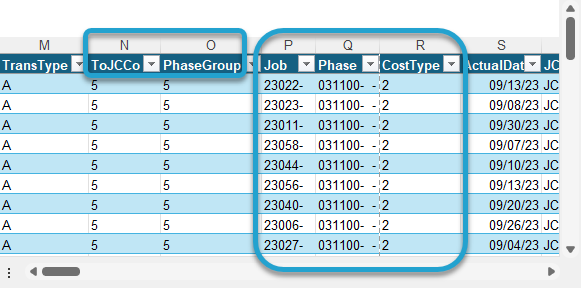
With the empty columns deleted, you can now Cut and Paste the columns into whatever order you want. In the example below, we will move the ToJCCo and PhaseGroup columns so that the Job, Phase, and CostType columns are together. This will make it easier to copy and paste data from other sources without having to adjust the layout repeatedly.
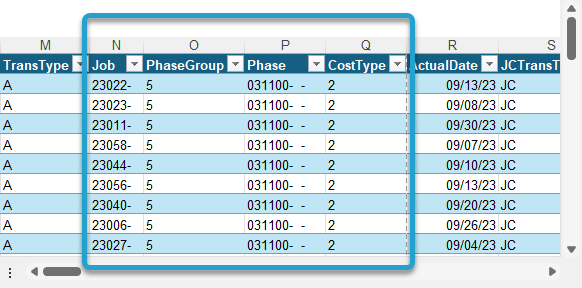
After rearranging, the Job, Phase, and CostType columns are now grouped together. This arrangement enables easier copying and pasting from other data sources, streamlining your workflow and reducing the risk of errors.
Save (Scrape) the Layout
After making your changes, you want to use the Scraper button to save the column layout. If you do not use the Scraper button and inadvertently download again, the layout will revert to the original all-columns layout.
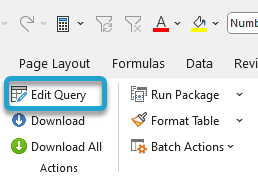
Click Edit Query on the ribbon to open the query editor.
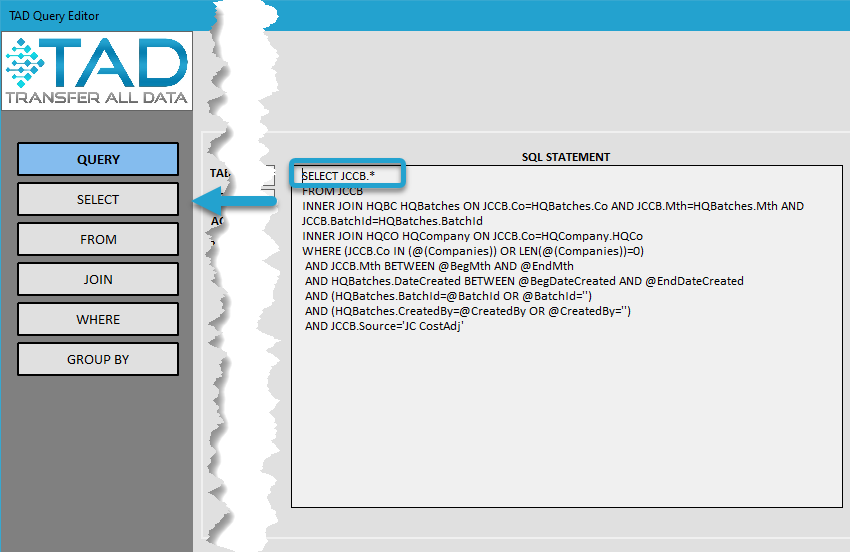
The current SQL statement still displays JCCB.*, indicating that all columns are included in the selection.
Click Select on the left side to modify the column selection.
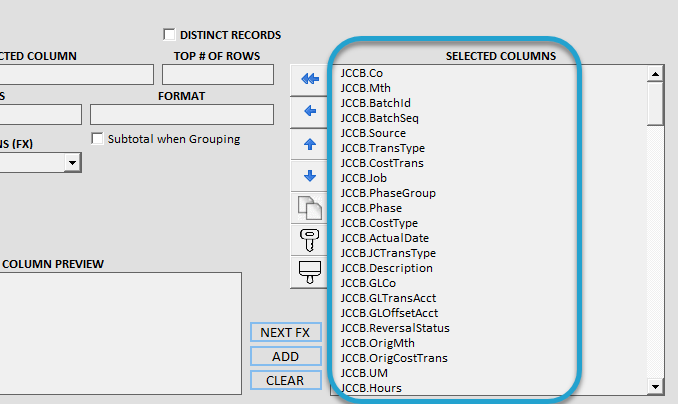
You will see the current Selected Columns displayed in the query editor.
Click the bottom button on the right side to proceed.
You will receive a confirmation prompt asking if you want to replace all columns with the current table layout.
Click OK to confirm and apply the changes.

The Selected Columns will now be updated to match the layout of the table in the worksheet.
Click Save Changes to apply and finalize the updated column selection.

The SQL Statement field will be updated to reflect the new column layout.
- Click Download Changes to save the changes and download fresh data based on the updated layout.
- Click Save Changes to finalize and store the updated column selection.