Getting Started #
You define the columns in a Table/Report using the Select section on the Query Editor.
You will be able to select from a list of Available Columns based on the configuration of the Table/Report.
Change Columns #
The steps below assume you have a Table/Report downloaded or are editing a query.
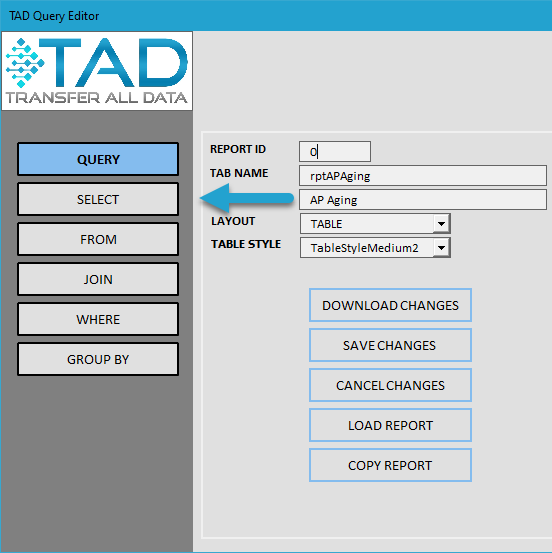
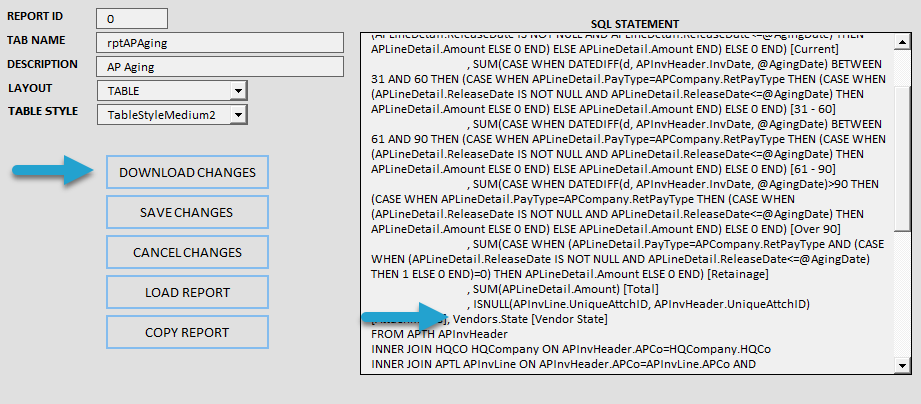
Click the Edit Query button on the ribbon.

Go to the Select section on the left.
The Available Columns list shows the columns that can be added to the download. This list is driven by the tables that exist in the From and Join sections. Joining more tables will provide more columns to choose from.
The Selected Columns list shows the columns that will appear in the download. You can rearrange these columns by using the blue up/down arrows or by dragging and dropping the columns on top of each other.
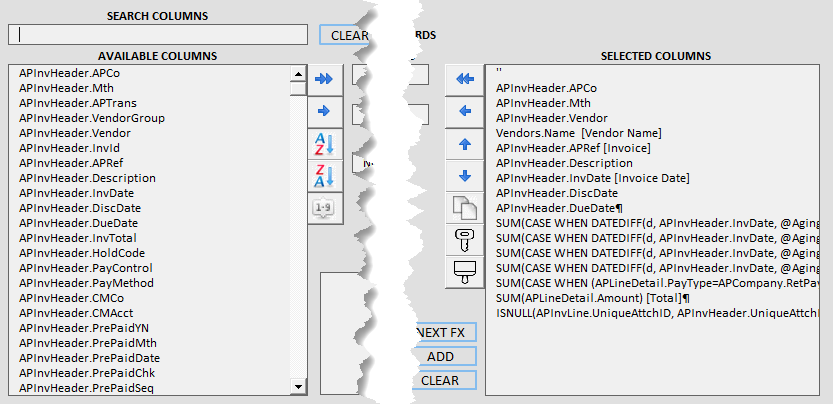
To add a column to the Selected Columns list, use one of the methods below:
- Double-click on the column.
- Select the column(s) and use the single blue arrow right.
- Select the column and use the little Add button in the bottom middle. This method can also be used to add an Alias or adjust the column Format.
- Click the double blue arrow right to add all columns.
- Drag and drop the column from the Available Columns list to the Selected Columns list.
To remove a column from the Selected Columns list, use one of the methods below:
- Select the column(s) and use the single blue arrow left.
- Click the double blue arrow left to remove all columns.
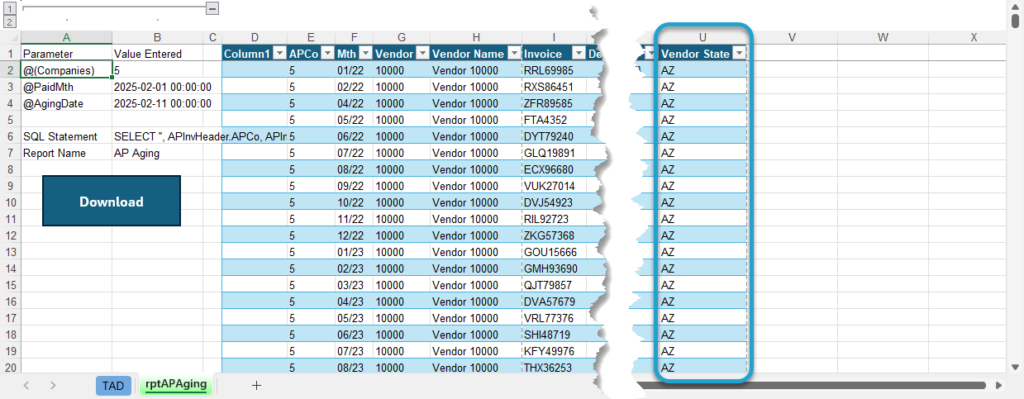
In the example below, we will add the vendor’s State with a column name of Vendor State.
Use the Search Columns box to filter the Available Columns.
Search for the column you want to add or find it in the list.

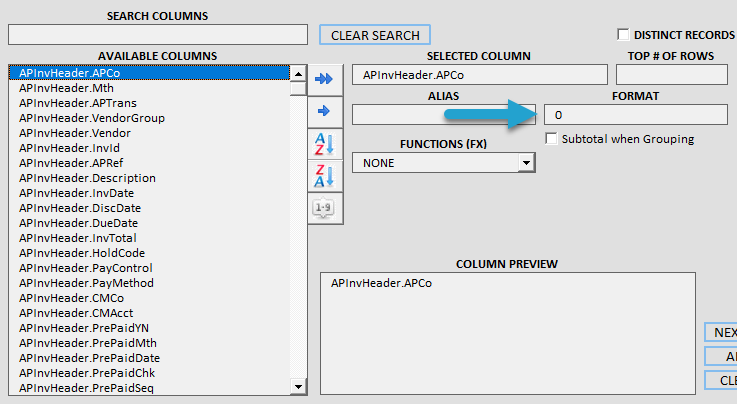
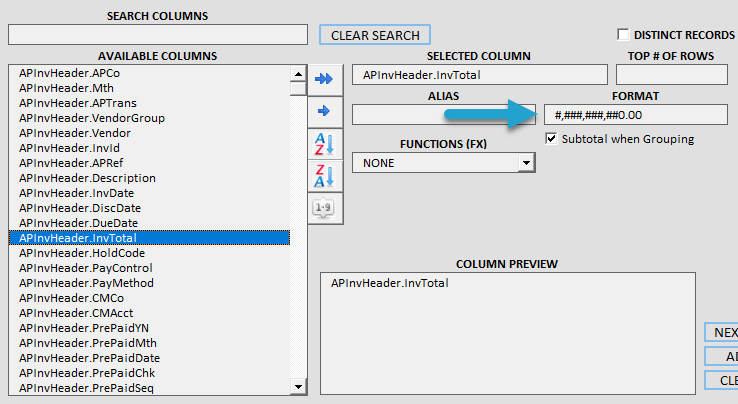
Select the column, which will populate the Selected Column field.
Optionally, update the Alias field if you want to change the column name in the output.
Optionally, update the Format field to change the column’s format in the output.
The Column Preview field will show you the final column structure.
Click the little Add button to add the column.

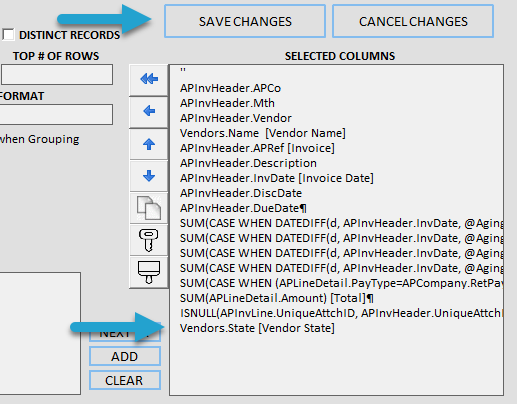
The column will now appear in the Selected Columns list.
Rearrange the columns by using the blue up/down arrows or dragging and dropping the columns on top of each other.
Add additional columns using the same steps above.
Click the Save Changes button when finished.
The SQL Statement field will be updated with your new columns.
Click the Download Changes button to save the changes and download fresh data.
The new columns will appear in your newly downloaded data.
Applying Formats to Report Columns #
In Excel, you can apply specific formats to cells such as General, Short Date, Number, and Text. These same formats are applied to Report columns after every download, giving you control over how your data looks.
When adding new columns, a default value will appear in the Format field based on the column properties.
Number Format without Decimals
Number Format with Decimals
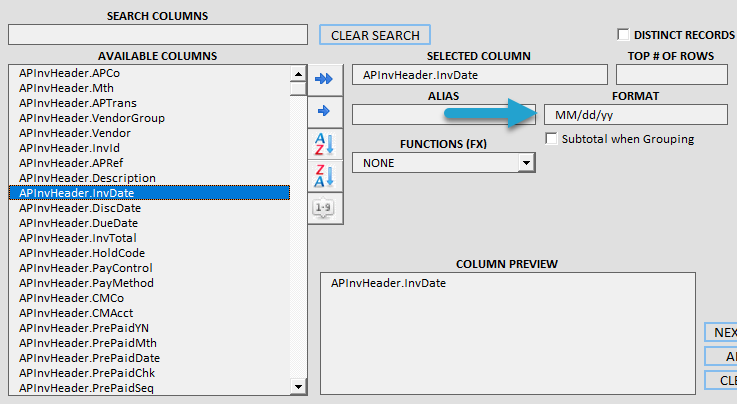
Date Format
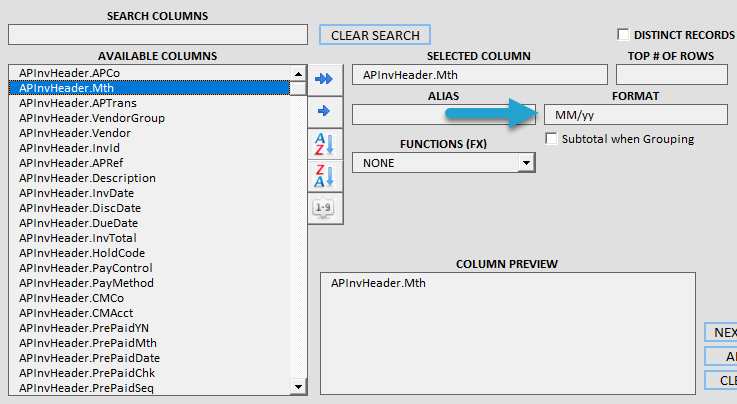
Month Format
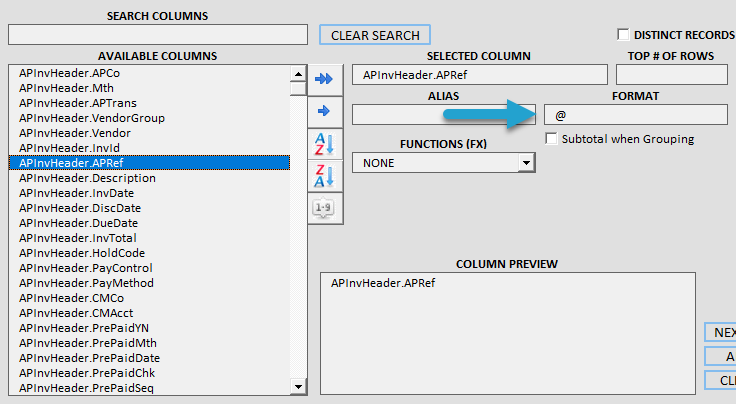
Text Format (This won’t drop leading zeroes)
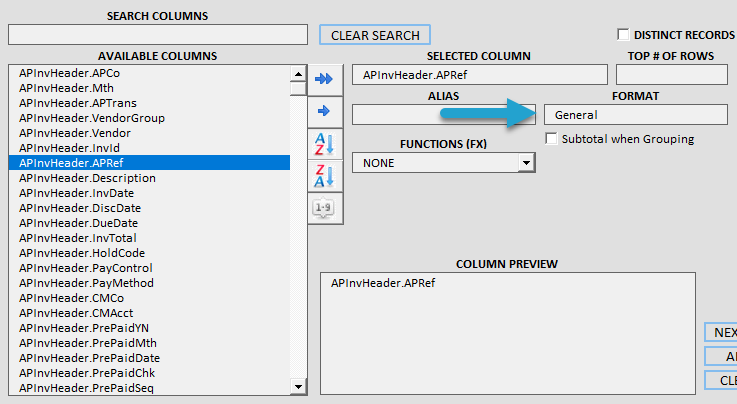
General Format (This will drop leading zeroes)
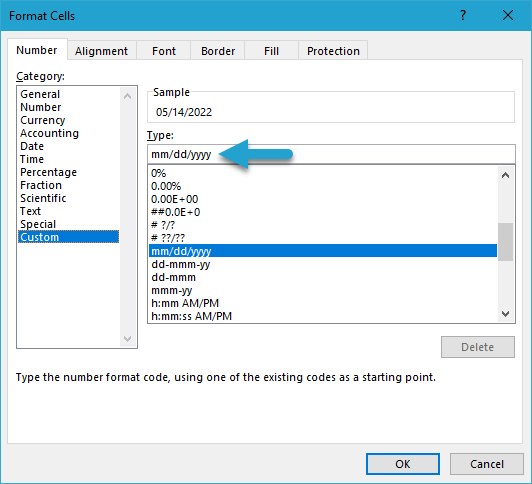
If you are unsure of what value to place in the Format field, you can retrieve it from Excel.
Right-click in the cell and choose Format Cells to bring up the form below.
Go to the Custom category, and the value in the Type field is what you want to put in the TAD Format field.