Getting Started #
If your Vista is hosted in the Cloud, each TAD user will need a separate SQL Account. This ensures that each user retains the same security restrictions as their Vista account. Additionally, having individual SQL accounts allows you to filter the TAD Log table by user.
Create Account #
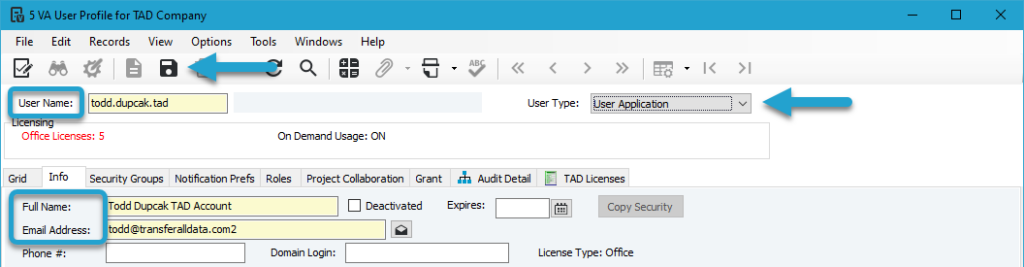
On the Vista main menu, go to Viewpoint Administration → Programs → VA User Profile.
Enter your User Name in the format of firstname.lastname.tad.
Enter your Full Name.
Enter your Email Address with a “2” at the end to bypass the duplicate email error.
Change the User Type to User Application so it doesn’t count against your licenses and prevents users from signing into Vista.
Click the Save button.
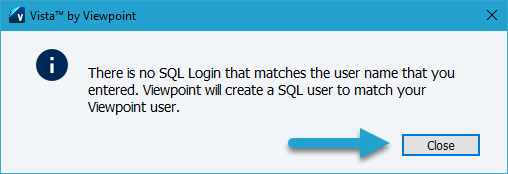
You will be prompted with the message below stating that no SQL Login exists, so one will be created.
Click the OK button.
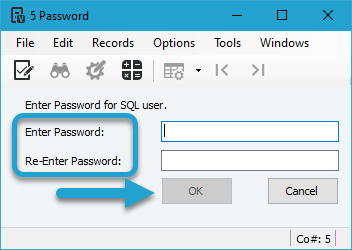
You will be prompted to enter a password for the account.
Enter the password and click the OK button to finalize the account.
Permissions Needed for Install #
If the account you created is being used for the TAD Install, submit a support ticket to Trimble with the subject:
“Please grant db_owner permissions to SQL Account <your_new_account> on the Viewpoint and VPAttachment databases. Also, remove the VCSUsers permission on the Viewpoint database.”
Data Security #
If you have data security active, you must add the necessary Security Groups to the new account. Otherwise, the user will not be able to see any data when downloading in TAD.
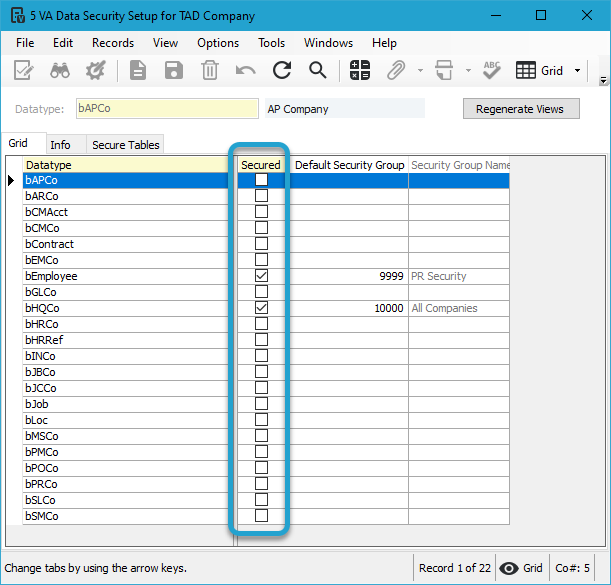
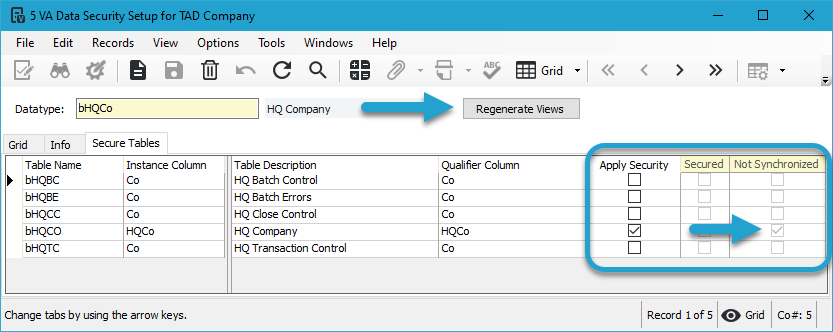
On the Vista main menu, go to Viewpoint Administration → Programs → VA Data Security Setup.
Data security is active when the Secured checkbox is checked.
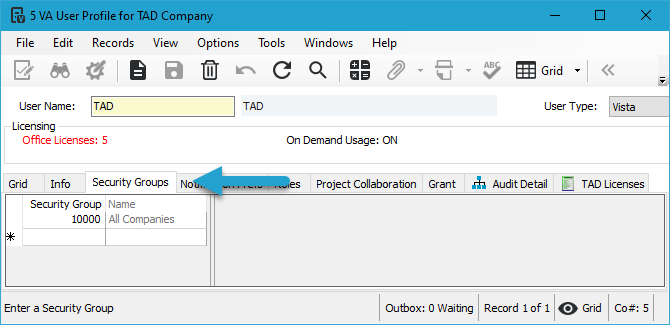
If data security is active, you need to add the data security groups to the new SQL Account on the VA User Profile → Security Groups tab.
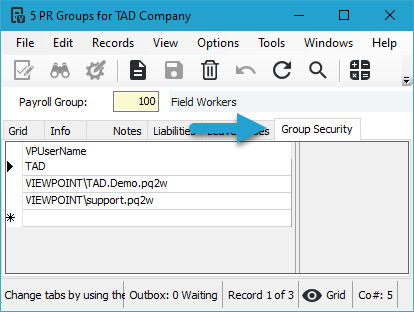
If you have the bEmployee datatype secured, you can grant access by adding the SQL Account to the Group Security tab on the PR Groups form.
Has Data Security Been Applied?
The Secure Tables tab on VA Data Security Setup shows whether data security has been applied.
The Apply Security checkbox is used to identify which Table Names you want to apply security to.
If Not Synchronized is checked, it means the security has not been applied.
Click the Regenerate Views button to apply the security.
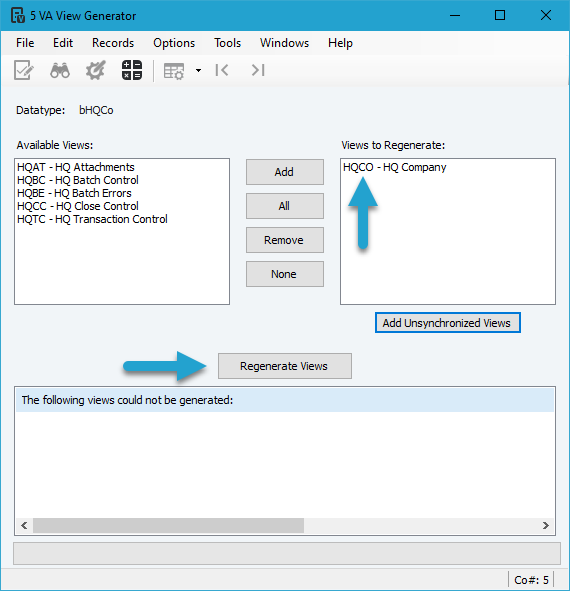
Click the Add Unsynchronized Views button.
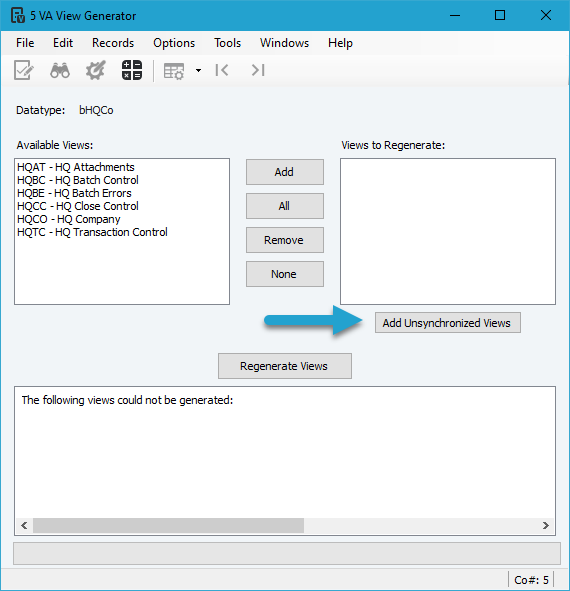
The upper right list will populate with all Views that need to be regenerated.
Click the Regenerate Views button.
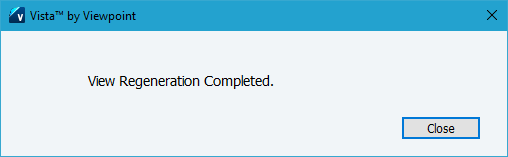
You will receive the message below indicating that the regeneration is complete.
You will see that the Secured checkbox is now checked, meaning security has been successfully applied.
