Getting Started #
The Delete action should only be used by individuals who are familiar with deleting records from Vista database tables. This action is rarely needed, but in specific scenarios, it can be beneficial.
Common Use Cases for Deleting Records
- Correcting Job Cost Payroll Wages – If real payroll wages were posted to Job Cost Detail (JCCD) instead of using the fixed rate, fixing the issue in the Payroll module creates an offsetting entry but does not remove the original sensitive rate. You can delete the two JCCD records to eliminate the activity.
- Removing Unwanted General Ledger Entries – If batches were posted with the General Ledger interface still active, you can delete the GL Detail (GLDT) records instead of creating an offsetting GL entry.
- Clearing User-Level Security Across Companies – When user security permissions exist across multiple Companies and Modules, you may need to delete them in bulk.
Backup and Risk Considerations
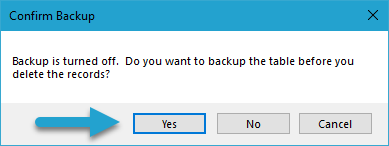
When deleting records, you will be prompted to create a backup of the table. It is strongly recommended to click Yes, but be aware that:
- This backup does not guarantee a 100% recovery, as triggers may delete related records in associated tables, which will not be backed up.
- Use this feature at your own risk, and always verify backup integrity before proceeding with deletions.
Summary Steps #
- Downloading Records for Deletes – Download the records you want to delete from Vista for reference.
- Identifying Records to Delete – Identify and mark the specific records in the table that need to be deleted.
- Validating the Delete – Validate the records marked for deletion to ensure they meet the criteria and are correct.
- Executing the Delete – Run the delete process to remove the identified records from the system.
Delete Records #
Downloading Records for Deletes
The first step is to download the records you want to delete. This example walks through deleting user-level form security records.
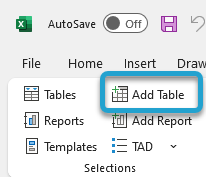
Click Add Table on the left side of the ribbon to begin.
Search for the table that contains the records you want to delete. In most cases, the Vista form name matches the table name, making it easier to locate.
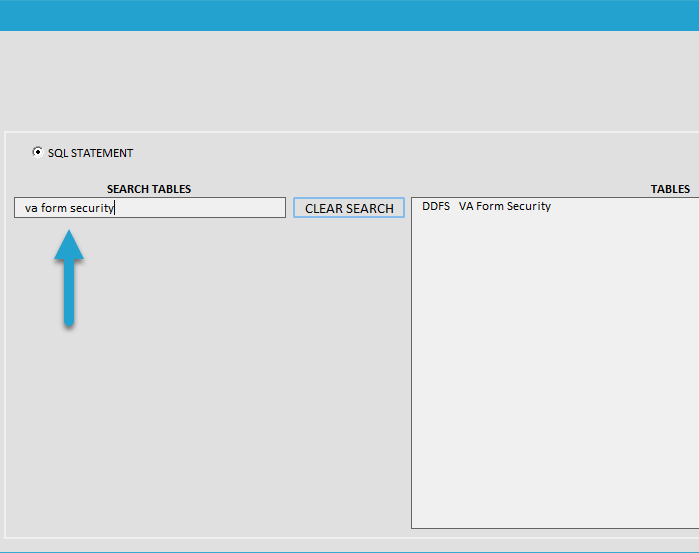
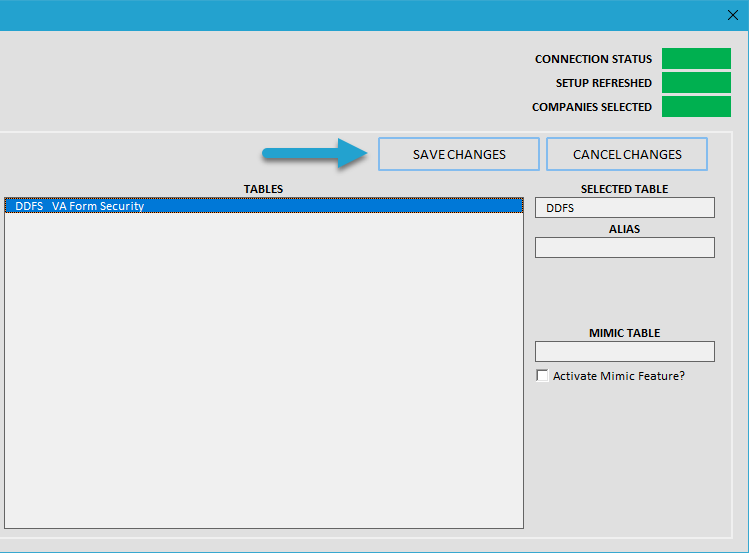
Either double-click on the table to select it or highlight the table and click the Save Changes button to confirm your selection.
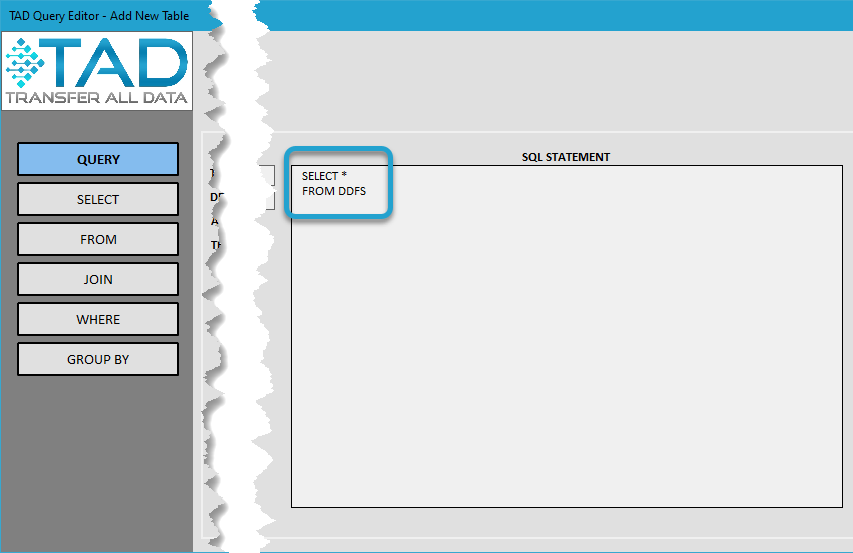
The base SQL statement retrieves all records and columns from the selected table. You can either proceed with the full dataset or refine your results using the Select, Join, and Where buttons on the left side.
The most common adjustment is adding filters with the Where button. This allows you to narrow the data to a specific Month, Job, or User, ensuring you only delete the necessary records.
Click Download Changes to retrieve the records from the selected table.
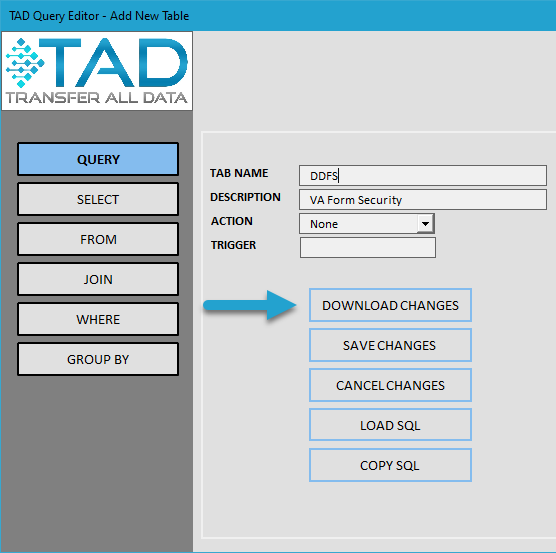
You will see a table displaying the records retrieved based on your download criteria.
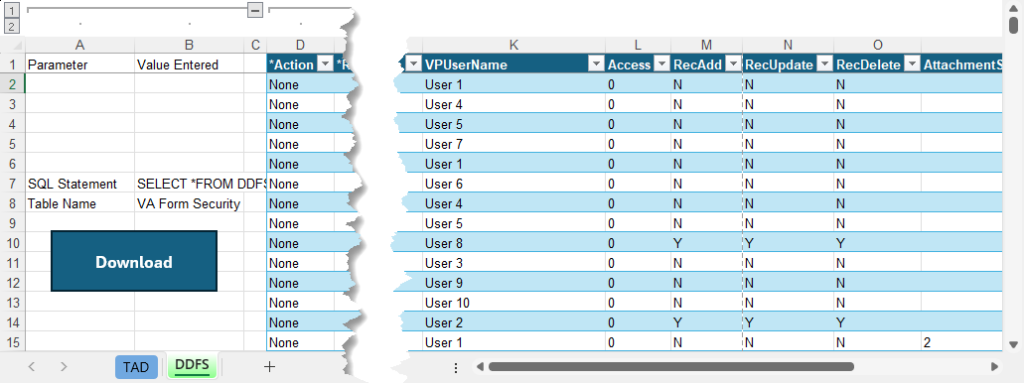
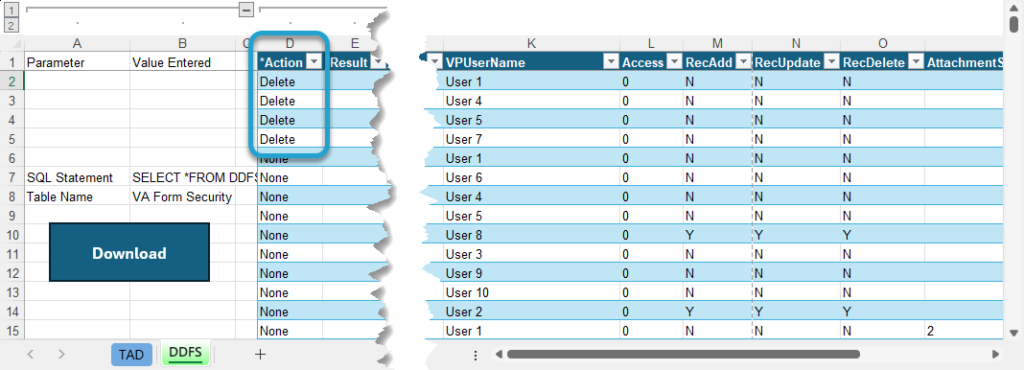
Identifying Records to Delete
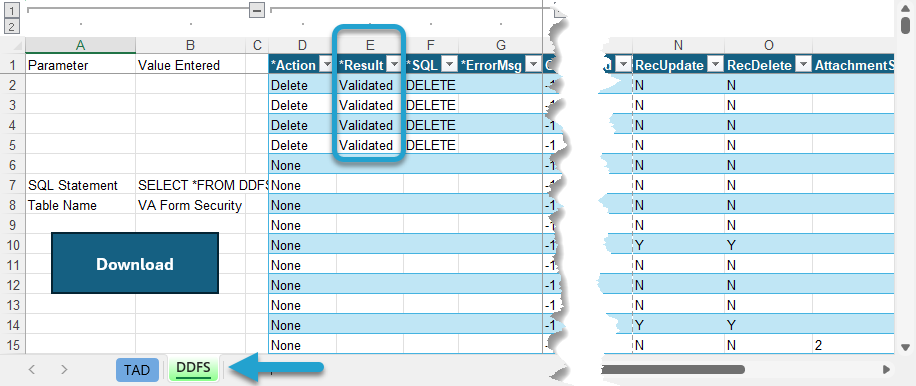
You can refine the data by using the filters in the Excel table or adjusting the Where clause under the Edit Query button. Once the records are isolated, update the *Action column to Delete for all records you want to remove.
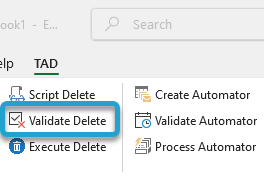
Validating the Delete
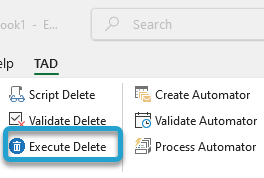
With your records marked, click Validate Delete on the ribbon to check for any issues before proceeding.
After clicking Validate Delete, check the following:
- The *Result column should display Validated for every record marked for deletion.
- The worksheet color should change to Green, indicating successful validation.
- If the *Result column shows Failure, refer to the *ErrorMsg column for details. The most common error occurs when the record has related transactions. You must delete those related records first before attempting to delete the failed record again.
- If the *Result column shows Validation Error, go to the TAD worksheet and look at the Action Result (Column K) to see what error exists across the entire table.
Executing the Delete
With everything validated, click Execute Delete to remove the selected records from the database.
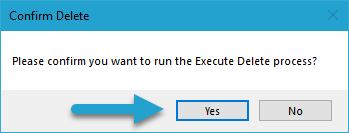
Click the Yes button to confirm the Delete.
Click Yes to create a backup of the table.
The backup will be saved in the format: TableName_Backup_YYYY_MM_DD_HHMMSS, ensuring you have a timestamped copy before records are deleted.
Once the process finishes:
- You will see Deleted in the *Result column for the records that were marked for deletion.
- You can click Download again to verify that the records no longer exist in the table.
