Getting Started #
If you already have TAD Version 2.28.0 or higher installed, you can use the Updater file to download and apply all available updates.
Only the individual who completed the initial installation has access to the Updater file.
You can find the Updater file by navigating to the installation location.
Default location:C:\Program Files (x86)\Transfer All Data\Transfer All Data
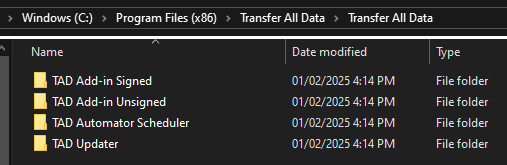
Click into the TAD Updater folder, where you will find the updater.exe file.

If you do not see the TAD Updater folder, then you did not complete the initial installation.
You will need the individual who performed the installation to follow the steps above, or you can download the TAD Installer yourself and follow the First-Time Installation instructions.
Running Updater #
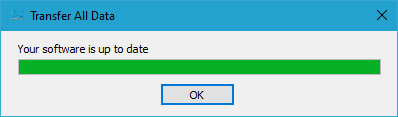
Double-click on the updater.exe file to start the update.
If no updates are available, you will see a message stating “Your software is up to date.”
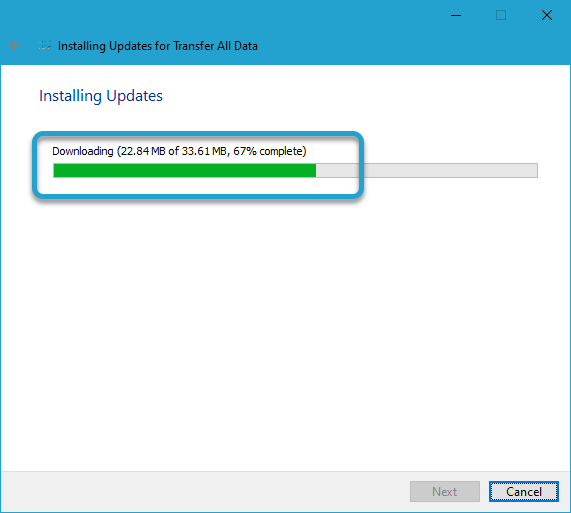
If updates are available, you will see a screen displaying the update size.
Click the Next button to start downloading the update.

You will see the download progress as the update is being downloaded.
When the download finishes, the Installer screen will appear.
Click the Next button to proceed.

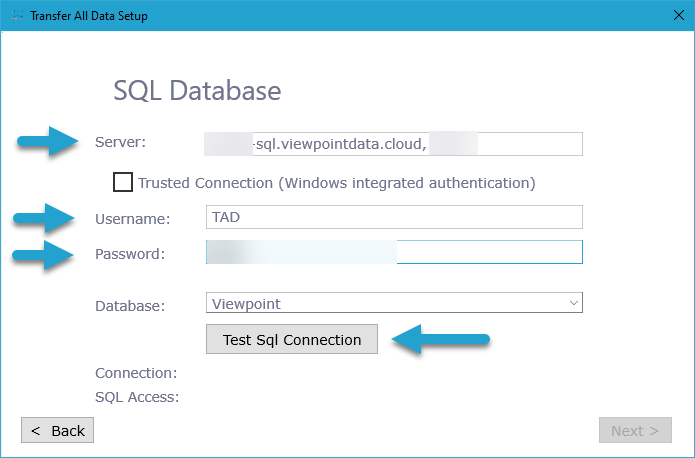
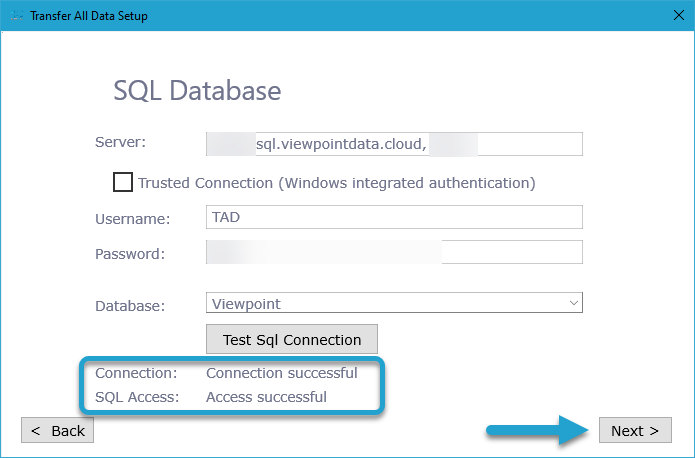
After clicking Next, the SQL Database screen appears.
- Enter the Server, Username, and Password.
- If you are using a Cloud server, enter your SQL Account credentials.
- Click the Test SQL Connection button to verify that your account has the correct permissions.
After clicking the Test SQL Connection button:
- If you receive an error, your Username does not have the correct permissions.
- If the error mentions the tadtTestSQLAccess table, it means the SQL Account has a permission issue.
- Ensure the account has the required access listed in the Installation Prerequisites.
- Verify that the VCSUsers permission is removed. This permission appears by default and overrides db_owner permissions.
- Otherwise, review the Installation Prerequisites to confirm the required permissions.
- If the error mentions the tadtTestSQLAccess table, it means the SQL Account has a permission issue.
- If the connection is successful, click the Next button to proceed.
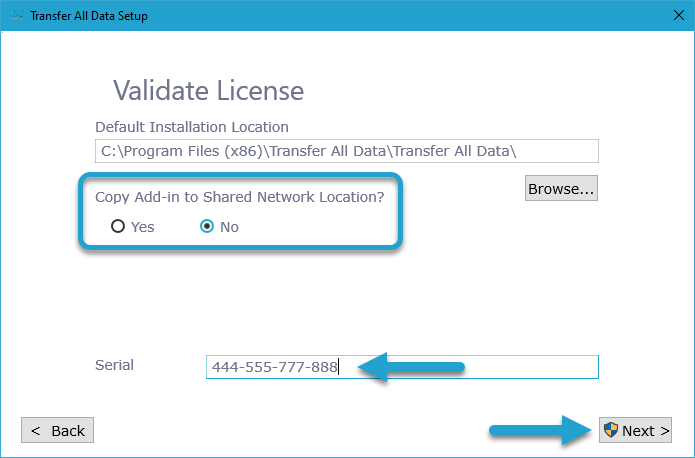
Shared Network Location
If you have multiple users, it is recommended to store the Excel add-in file in a shared network folder. This simplifies future updates, as you only need to replace a single file.
To enable this, select Yes for the Copy Add-in to Shared Network Location field.
Click the Browse button to choose the shared network location.
Serial Number
Enter the Serial Number found in the TAD Client Portal.
Click the Next button to proceed.
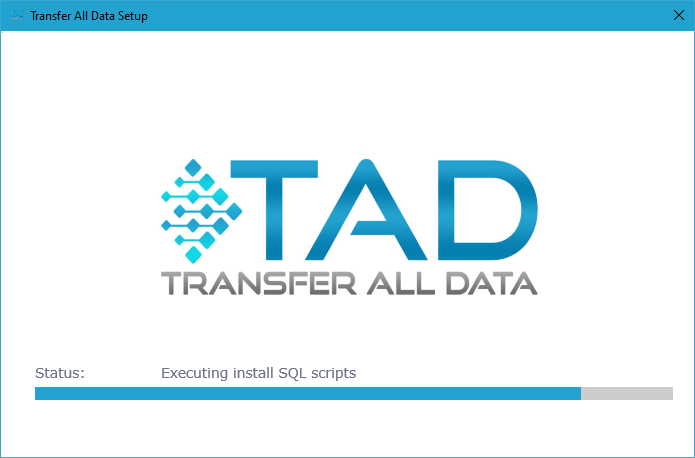
The installation typically takes between 15 and 120 seconds. Allow the process to run until it completes.
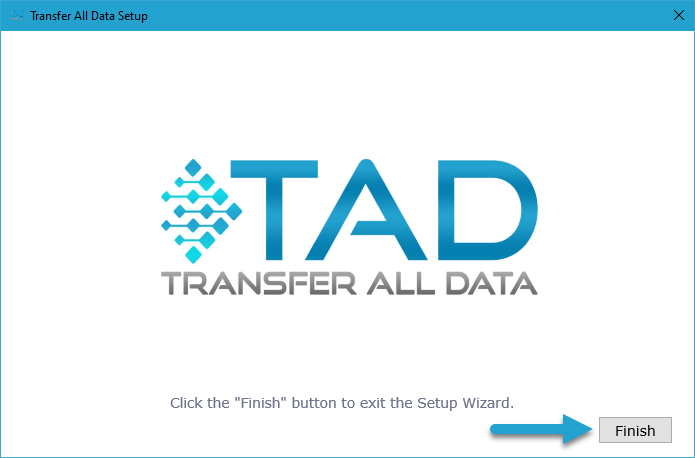
Once the installation is complete, click the Finish button.
You can view the installed files by navigating to the installation location. The default location is:
C:\Program Files (x86)\Transfer All Data\Transfer All Data