Getting Started #
The Import action allows you to efficiently add records to the database, reducing manual data entry. While the standard import module has limited options, using batch imports streamlines the process and minimizes errors.
- Import new configurations – Add records such as Departments or other setup data.
- Import transactional data – Load GL Journal Entries, JC Cost Adjustments, or other batch tables.
- Import beginning balances – Migrate financial data for new implementations.
Summary Steps #
- Manually Entering a Record in Vista – Enter the record data manually into the Vista system as a reference for the import process.
- Downloading the Table – Download the appropriate table from Vista to get the current dataset for the import.
- Adding Records to the Table – Add the new records to the table, ensuring all required fields are populated.
- Formatting the Table – Format the table to ensure it follows the correct structure for the import process.
- Validating the Import – Perform validation checks to ensure the data meets import requirements and is error-free.
- Executing the Import – Run the import process to load the data into the system, ensuring everything is successfully transferred.
Import Records #
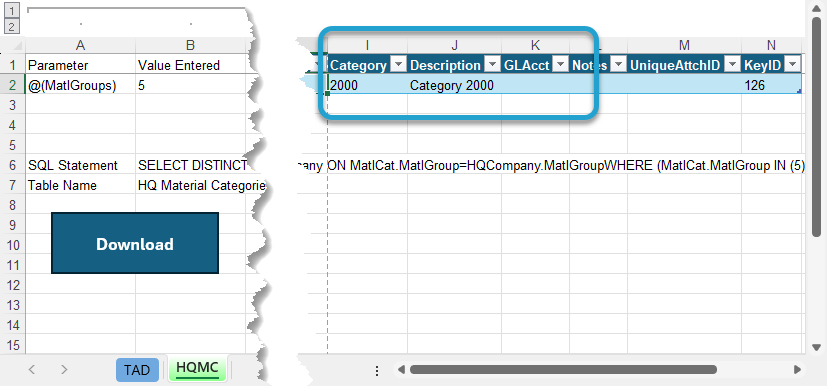
Manually Entering a Record in Vista
The easiest way to identify which columns require values is to manually enter a single record in Vista. Once entered, you can download that record and use it as a reference for entering the remaining records. If you’re already familiar with importing into the specific table, you can skip this step.
Since a standard Vista import template does not exist for material categories, this example will walk through the process step by step.
Downloading the Table
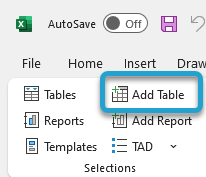
Click the Add Table button on the left side of the ribbon.
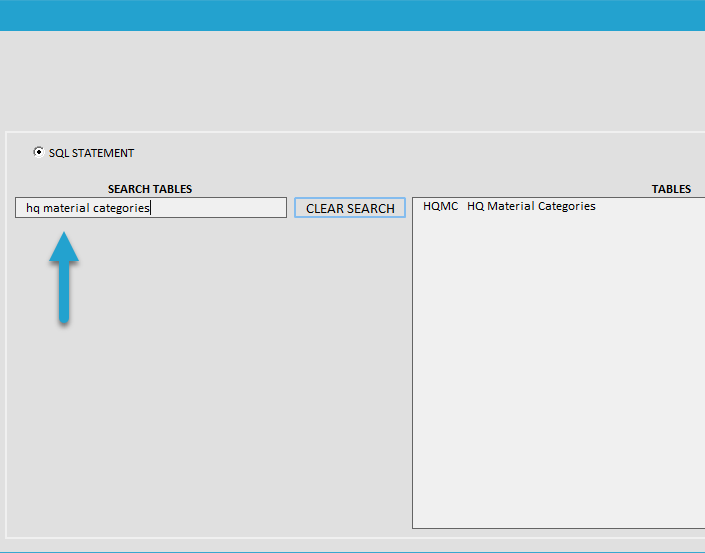
Search for the table that contains the records you want to import. In most cases, the Vista form name corresponds to the table name, making it easier to locate.
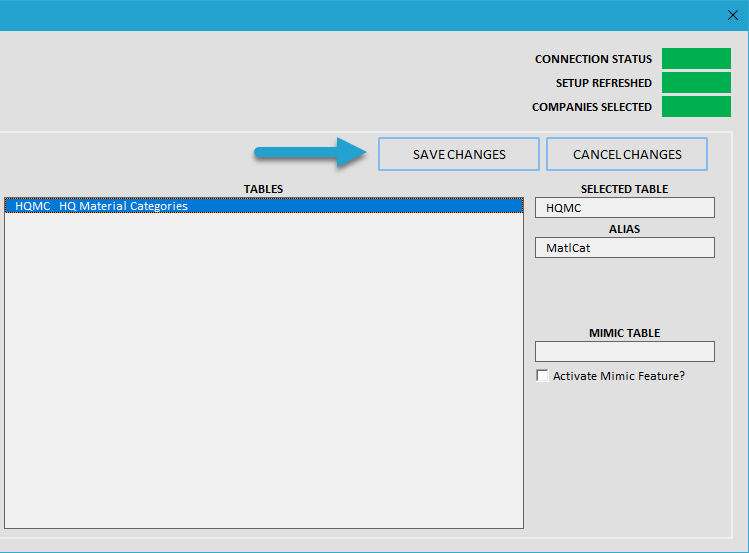
Either double-click on the table to select it or highlight the table and click the Save Changes button to confirm your selection.
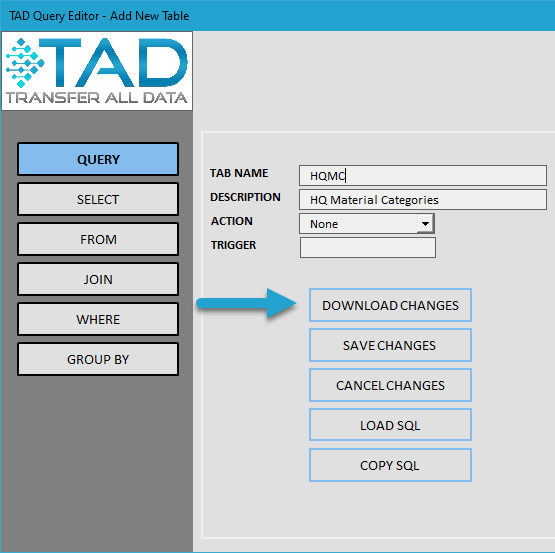
The base SQL statement retrieves all records and all columns from the selected table. It is recommended to download the base statement without making changes using the Select, Join, and Where buttons on the left side. Keeping the default structure ensures accuracy and prevents missing required fields during import.

Click Download Changes to retrieve the records from the selected table.
After downloading the base SQL statement, you will see a table displaying the manually entered record (if you added one).
If the table contains a large number of columns, refer to the Helpful Buttons section below for tips on managing and viewing the data more efficiently.
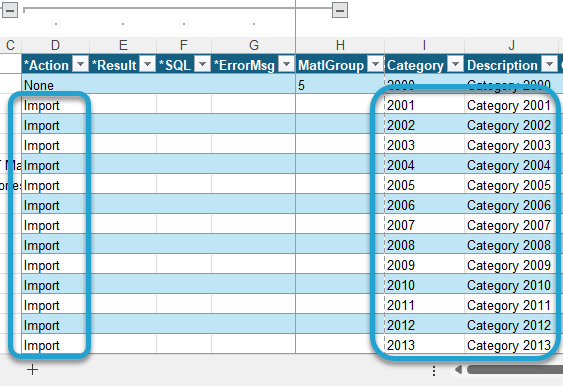
Adding Records to the Table
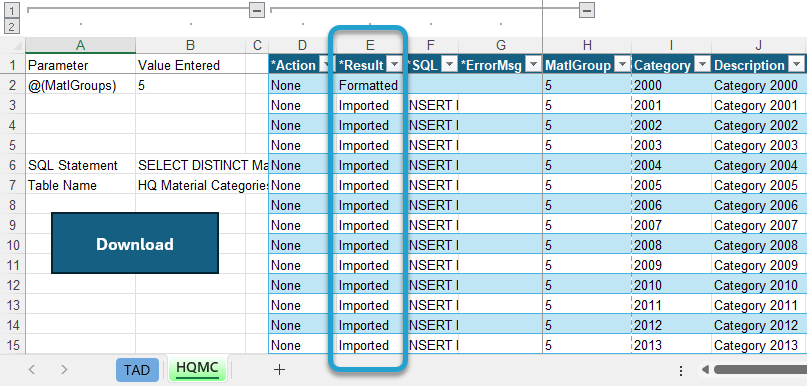
Add the remaining records to the table. In this example, 24 additional material categories are being added.
- If you downloaded a sample record, update the *Action column to Import for all new records you want to include. This ensures the sample record is excluded from the import. Alternatively, you can delete the sample record from the table.
- If you want to import all records in the table, no changes to the *Action column are necessary.
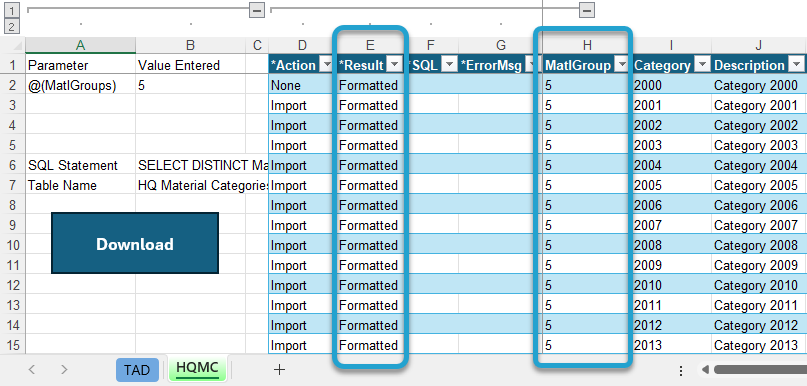
Formatting the Table
Click the Format Table button on the ribbon. This action will:
- Add missing default values, such as the MatlGroup column.
- Ensure proper formatting of values in each cell to align with import requirements.

After clicking Format Table, you will see Formatted in the *Result column.
- The MatlGroup column now has default values applied.
- Other required fields may also be adjusted to meet import requirements.
Validating the Import
Click the Validate Import button on the ribbon.
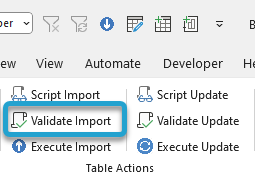
After clicking Validate Import, check the following:
- The *Result column should display Validated for every record marked for import.
- The worksheet color should change to Green, indicating successful validation.
- If the *Result column shows Failure, refer to the *ErrorMsg column for details on the issue.
- If the *Result column shows Validation Error, go to the TAD worksheet and look at the Action Result (Column K) to see what error exists across the entire table.

Executing the Import
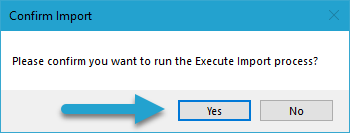
With everything validated, click Execute Import to import the records into the database.
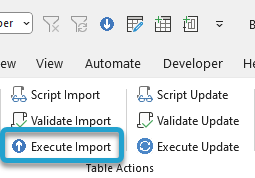
Click the Yes button to confirm the Import.
Once the process finishes:
- You will see Imported in the *Result column for the new records.
- You can click Download again to refresh the table and verify that the records have been successfully imported.
Helpful Buttons #
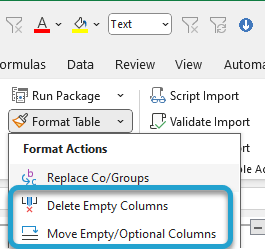
The Format Table button has a sub-menu with two options that help identify which columns require values:
- Delete Empty Columns – Removes all columns that are completely empty.
- Move Empty/Optional Columns – Moves empty and non-required fields to the end of the table, keeping required columns and those with data at the beginning.
If you use either button make sure to use the Scraper feature to save the layout. If you do not save the layout and download again then it will revert back to the original all columns layout.