Getting Started #
Tables allow you to import, update, and delete records in the Vista database, making it easier to transfer setups and configurations when IM Import Templates are unavailable.
With TAD, you have access to every table in the database, providing greater flexibility for:
- Performing bulk updates
- Troubleshooting issues
- Integrating data across different modules without relying on standard import tools
This streamlined approach enhances data management and improves workflow efficiency.
Table Structure #
No matter whether you’re importing, updating, or deleting data, the first step is always to download a table. The image below illustrates the selection of the AP Vendors table.
For most tables, the Alias field will automatically populate. This serves as an alternate name, making it easier to select columns without needing to remember that APVM corresponds to AP Vendors.
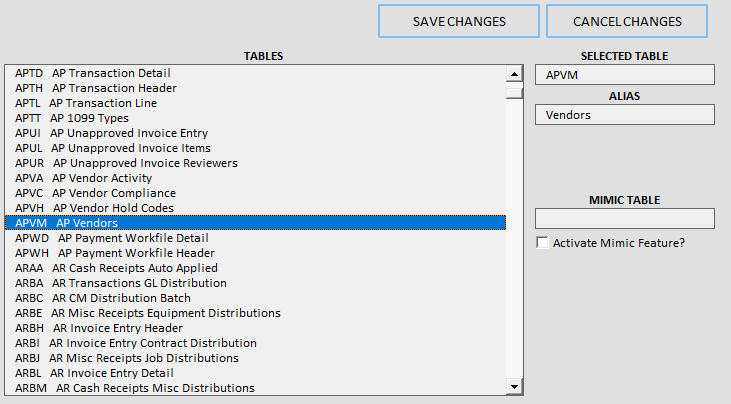
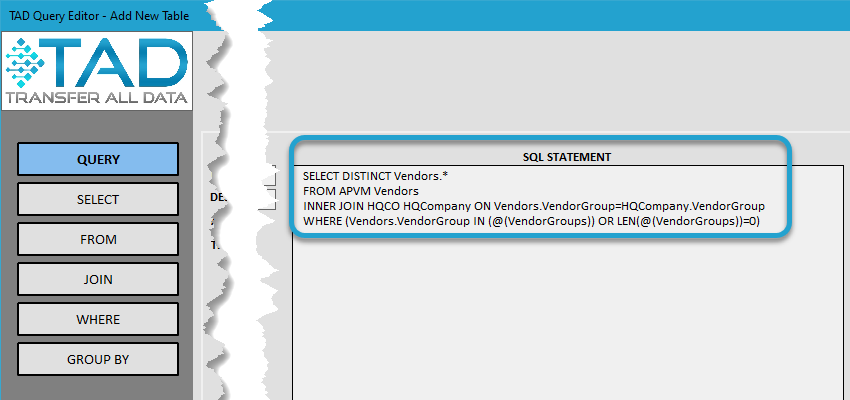
When you select a table, a SQL statement is generated, retrieving all columns and records for the selected companies.
You can customize the output before downloading by:
- Modifying the column layout in the Select section
- Adding related tables in the Join section
- Applying filters in the Where section to narrow down the data
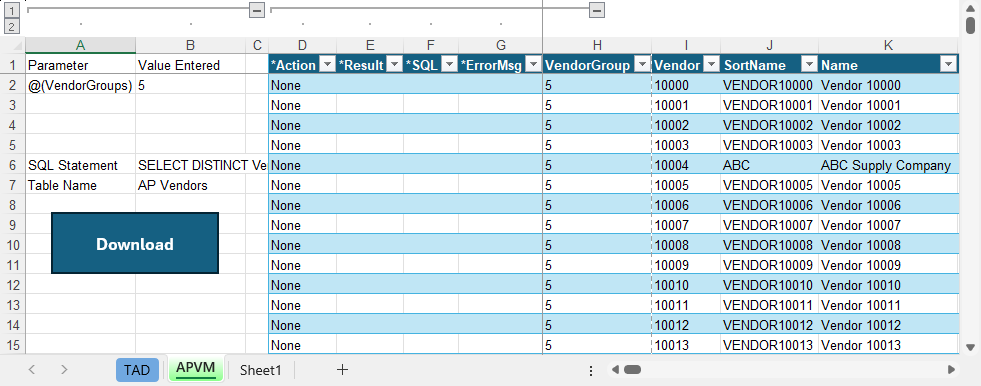
The data will be downloaded into an Excel table, as shown in the image below.
The table will include columns such as Columns D – G, which are used by the TAD process to display results and/or error messages when performing any TAD actions.
Core Actions #
Imports
The Import action allows users to add new data to the Vista database, especially when IM Templates are unavailable. Users can:
- Download a table
- Input the necessary data
- Format, validate, and execute the import
This structured process ensures that new records are accurately incorporated into the database.
Updates
The Update action enables users to modify existing records in the Vista database. By downloading the relevant table, users can:
- Identify and edit specific records
- Format, validate, and execute updates
This ensures that all modifications are correctly applied while maintaining data integrity.
Deletes
The Delete action allows users to remove records from the Vista database. Due to the risks associated with data deletion, TAD prompts users to create a backup before proceeding.
⚠ Important: The backup may not capture all associated records, especially those affected by triggers in related tables. Users should exercise caution and ensure they have adequate backups before performing deletions.
Table Actions Buttons #
The Table Actions buttons are accessible from the ribbon and function exclusively with tables. These actions provide essential tools for importing, updating, deleting, and managing batch operations.
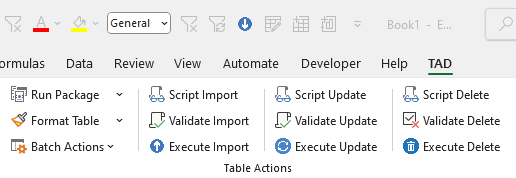
General Actions
- Run Package – Runs the package assigned to the specific table. This allows multiple actions to be executed in sequence, which can be useful for posting batches. → What are Packages?
- Format Table – Formats data to prevent issues when importing or updating records.
- Batch Actions – Provides various batch-specific actions for tables that support batch processing. → Intro to Batches
Import Actions
- Script Import – Generates INSERT statements for each record, which can be executed in SQL Server Management Studio (SSMS).
- Validate Import – Ensures that the records being imported will succeed without errors.
- Execute Import – Imports the validated records into the database.
Update Actions
- Script Update – Generates UPDATE statements for each record, which can be executed in SSMS.
- Validate Update – Ensures that the records being updated will succeed without errors.
- Execute Update – Updates the validated records in the database.
Delete Actions
- Script Delete – Generates DELETE statements for each record, which can be executed in SSMS.
- Validate Delete – Ensures that the records being deleted will succeed without errors.
- Execute Delete – Deletes the validated records from the database.
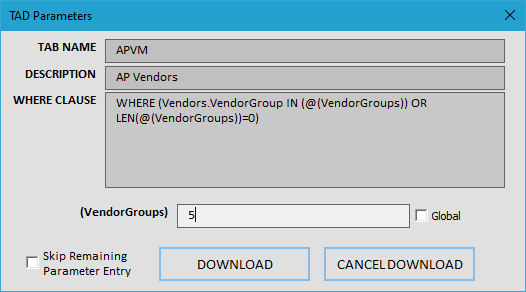
Parameters #
When downloading most tables, you’ll find a parameter that allows you to filter data by Company or Group.
- Press F4 or double-click the parameter field to open the TAD Lookup form.
- Parameters enclosed in parentheses ( ) can accept multiple values, depending on the Companies available in your environment.
For example, the AP Vendors table includes a parameter for Vendor Groups.
The AP Transaction Header table includes a parameter for AP Companies, allowing you to filter invoices based on company selection.
