Getting Started #
The TAD Query form is opened by any of the Selections buttons and the Options button on the TAD Ribbon.
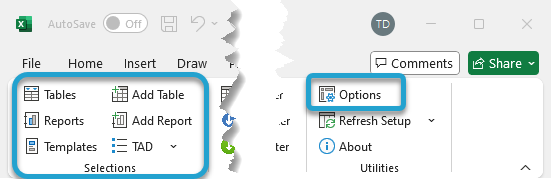
Clicking any of those buttons will open the form below.
The top section mirrors most of the Selections buttons and Options button on the ribbon.
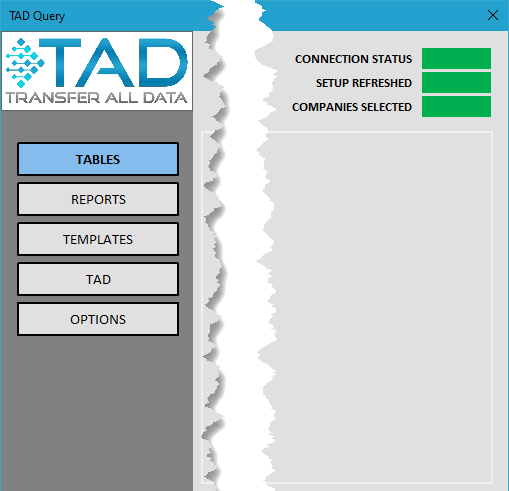
Depending on what you select, the bottom section may appear. That is the Query Editor where you can edit the structure (columns, joins, conditions) of the Table/Report.
Selection Buttons #
- Tables
- Download one or more tables with the intent to import/update/delete records.
- Reports
- Download one of the standard reports.
- Download one of the Company Reports that you can upload to your Vista configuration.
- Templates
- Download a template containing Tables with specific configurations.
- These may have specific column layouts or additional actions like the Batches templates.
- TAD
- Add, Delete, Copy and Download the Tables and Reports in the workbook.
- Options
- Use this to connect to your Vista SQL Server.
- Change your options and/or default Companies.
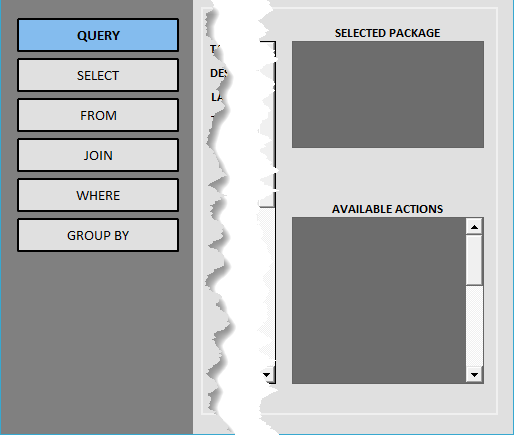
Query Editor Buttons #
- Query
- This shows the full SQL Statement and allows you to change the Layout Type for Reports.
- Select
- This shows all columns available to display based on the tables selected.
- From
- This shows the available tables to use as your main table.
- Join
- This shows all columns with available joins based on the tables selected.
- Where
- This shows all columns available to condition based on the tables selected.
- Group By
- This shows a filtered list of the selected columns on the Select part.