Getting Started #
The Report Design layout enables you to organize downloaded data into header and footer groupings, offering an alternative presentation to the standard Excel table. These groupings can also include subtotals positioned in either the header or footer.
You can select one or more Available Columns to determine the tiered groupings.
This should function well speed-wise when dealing with most standard TAD reports. However, it is not recommended to download large datasets, as the process may take a long time generating the groupings.
Add Report Design Groupings #
The steps below assume you have a Table/Report downloaded or are editing a query.
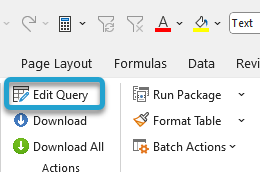
Click the Edit Query button on the ribbon.
Go to the Group By section on the left.
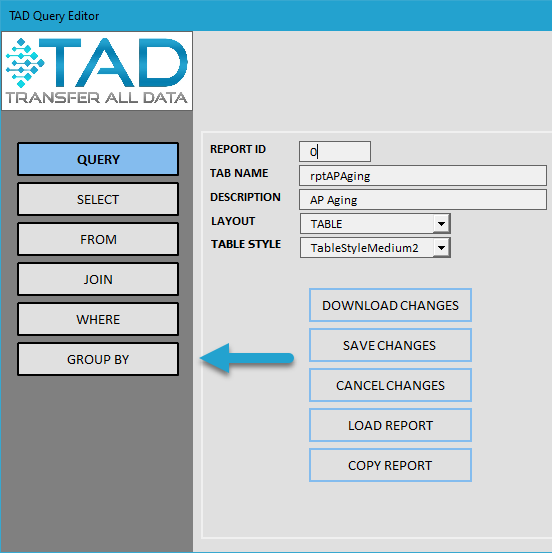
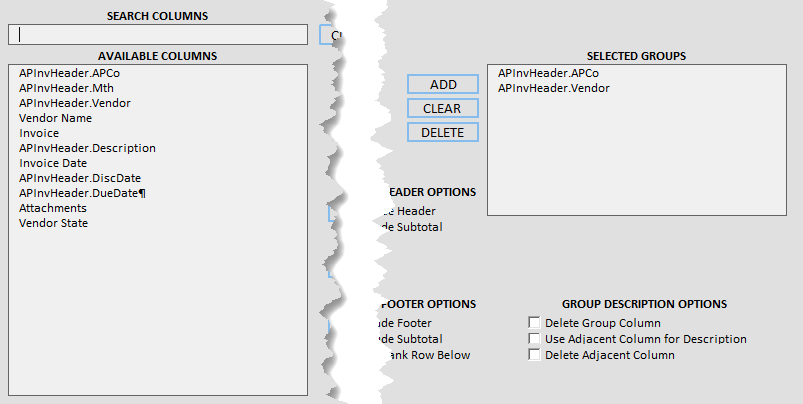
The Available Columns list shows what columns can be used for the groupings. This list is driven by the Selected Columns in the Select section.
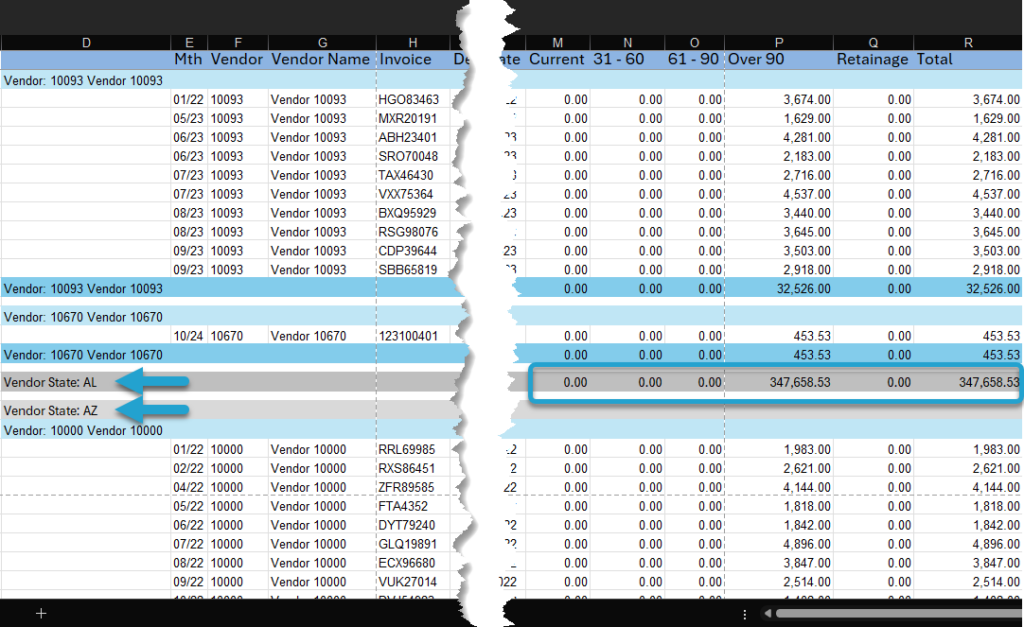
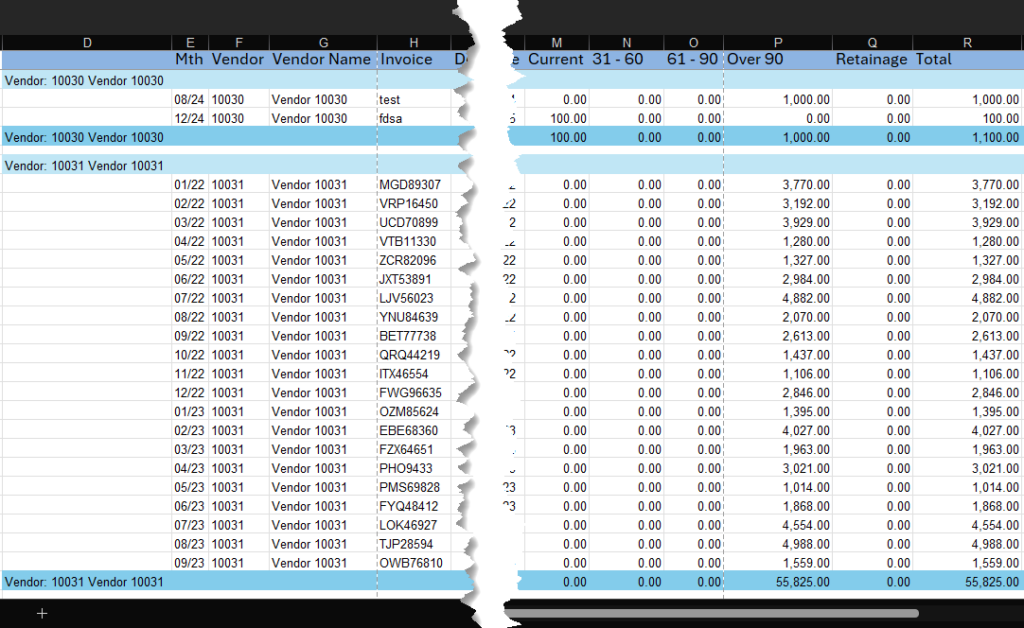
The Selected Groups list shows the columns that are currently being used for grouping the data. In the image below, the AP Aging data will have groupings and subtotals by Company and then by Vendor.
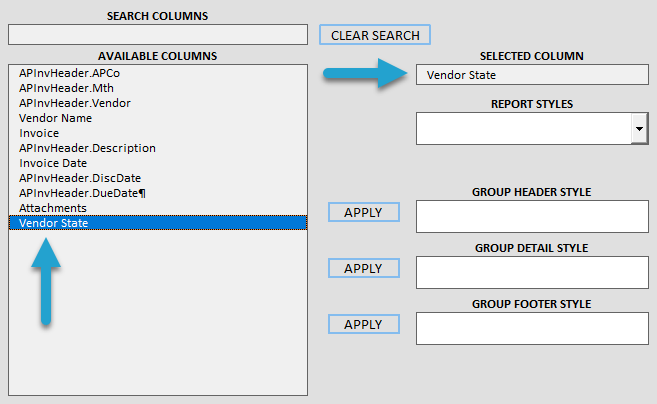
In the example below, we want to add a grouping for the vendor’s State, so the full order will be Company, State, and Vendor, each with separate subtotals.
Use the Search Columns box to filter the Available Columns.
Search for the column you want to group by or find it in the list.
Select the column, which will populate the Selected Column field.
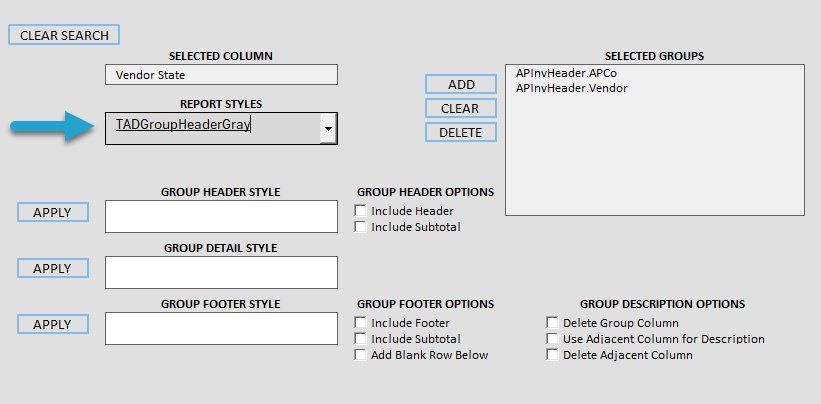
Use the Report Styles combo box to select the style that you want to apply to the header or footer grouping. As you cycle through the combo box options, the field format will change, giving you a preview of what the styles look like.
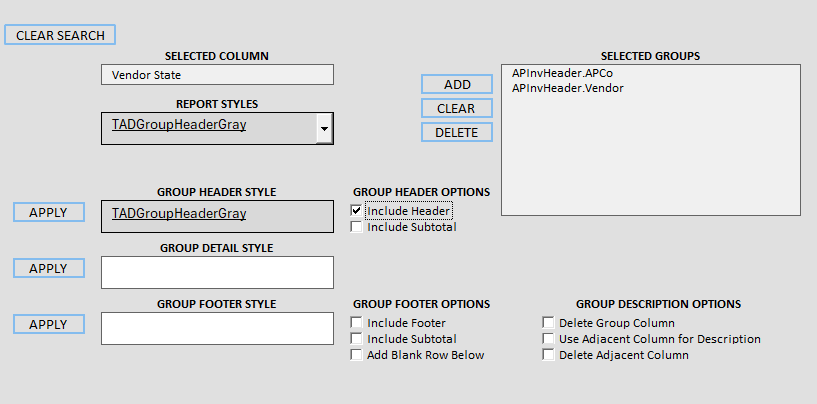
Add Group Header
If you want a group header, check the Include Header checkbox.
If you want subtotals in the header, check the Include Subtotal checkbox.
Click the Apply button next to the Group Header Style field.
Add Group Detail
The Group Detail Style allows you to control the format of the rows that contain the data records. The style needs to be assigned to the last Selected Groups value.
Add Group Footer
If you want a group footer, check the Include Footer checkbox.
If you want subtotals in the footer, check the Include Subtotal checkbox.
If you want a blank row to separate the group header/footer records, check the Add Blank Row Below checkbox.
Click the Apply button next to the Group Footer Style field.
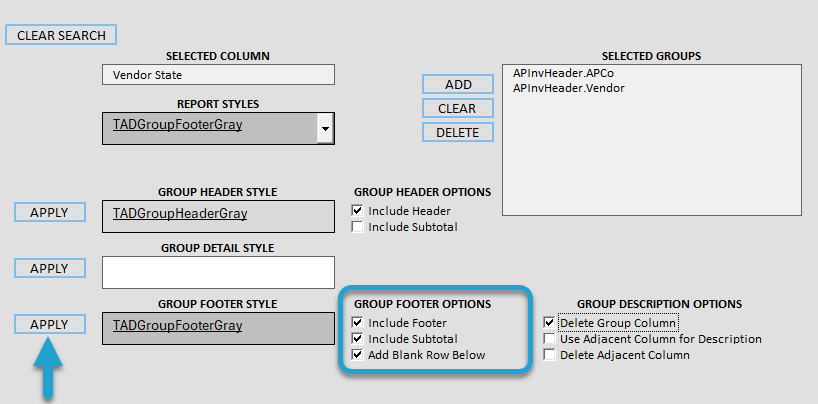
The Delete Group Column checkbox will delete the column used for the groupings after everything is finished.
Click the little Add button to add the column.

The column will now appear in the Selected Groups list.
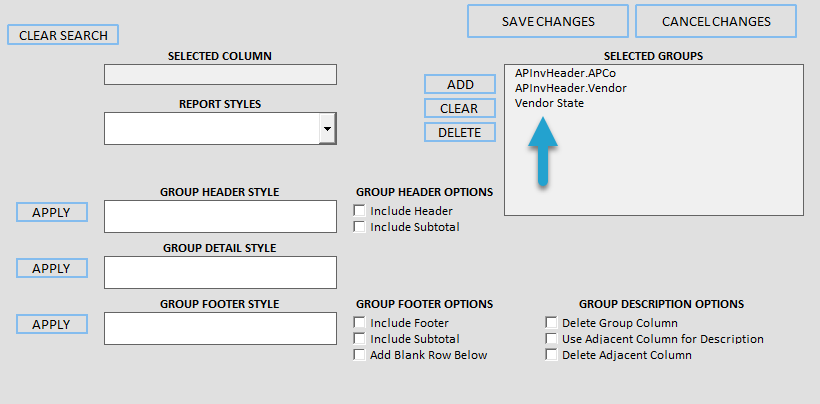
You can drag and drop the columns to rearrange them.
Add additional columns using the same steps above.
Click the Save Changes button when finished.
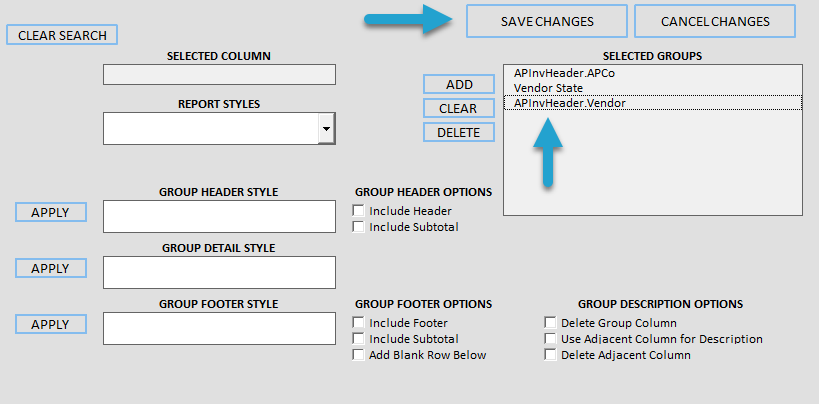
The SQL Statement field will be updated with your new sort order, which also includes the header/footer groupings.
Click the Download Changes button to save the changes and download fresh data.

The data will download with the new groupings.